SILVER SOLDERING TIPS
If you have been modeling for a while you have probably had to do some
non-electronic soldering at one time or another. The best candidate for this is
Silver Solder.Click Here
TOP NOTCH TIP
There, perfect. Now if I can just hold it right there and reach over and get the
glue and put a bead right…. Dang it’s clogged again. Sound like a soap
commercial? There is an easy and inexpensive way to prevent ALL of your glue
devices from doing what glue is supposed to do before it’s supposed to do it.
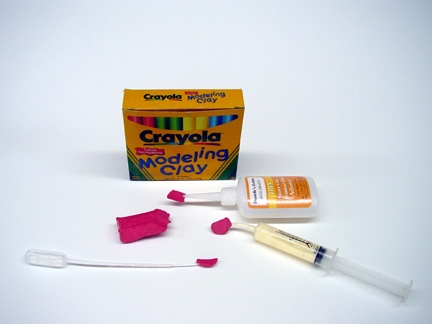
Put on your neediest face and ask your kids for a clump of there modeling clay.
If you don’t have kids or they don’t have clay, you can pick up some at your
local clay store. I got mine in the toy department at my local Target store
about ten years ago and I still haven’t made a dent in the box. Pinch off a
piece of clay and pinch it over the end of your glue gun, CA pipette or CA
bottle. I have left my glue devices for as long as six months and when I pulled
off the clay they were ready to use.
TOP NOTCH TIP
When constructing a structure that must be bent such as the forward fuselage
section, it is helpful to select similar wood for both sides. Here is one way
that works well. Select the triangle and 1/4” square stock you want to use.
Then cut the sticks in half and use material from the same sticks on both
sides. There is no guarantee that the sticks will be consistent from end to
end, but the odds are better then using dissimilar stock.
TOP NOTCH TIP
When building the pylon we think there is a better way then that described in
the instruction sheet. The pylon is composed of two halves that mirror each
other. It’s difficult to get the two halved to match perfectly as described on
the plans. Here is what we suggest. Build the first half as described in the
plans. Remove that half from the plan and cut a piece of waxed paper just large
enough to cover the pylon. Place that over the finished half and then clamp the
second half of the pylon to first one. Take care to align them closely. Now
install F10 and F11 to the second pylon half. Add the leading and trailing
edges, lining each of these components up with the other side. Let this glue
set up well before removing the second pylon half from the first half. Now
sheet the second half and you should have pylon halves that mate perfectly.
TOP NOTCH TIP
A word about laser cut parts and adhesives.
There are three primary types of adhesives recommended for constructing your model. They are Cyanoacrylate
(CA) in all viscosities, Aliphatic Resin Glue (carpenters glue) and Epoxy. In the interest of speed, CA is the primary adhesive to use
however there are times when it is not the best choice. They are:
1. When you need more time to carefully position a part than a fast setting adhesive will allow.
2. When attaching plastic such as a windshield (Use Pacer formula 560 here).
3. When gluing laser cut aircraft grade plywoods. The microwave set adhesives used in aircraft grade plywood
does not ablate well under a laser beam. As a result it burns the wood fibers near by leaving a charred edge. Fast
setting CA adhesives do not allow time for the adhesive to penetrate this layer of char and bond to the wood fiber
underneath. Use a slower setting adhesive such as Aliphatic Resin or for maximum strength use Epoxy on aircraft
grade ply parts. Lite Ply’s do not use this type of adhesive and do not suffer from this problem.
To apply thin CA I recommend the Dave Brown pipet’s available at your hobby shop. Be sure to stretch the end
(pull it with a pair of pliers) to a thin applicator tip, as they are not supplied in this configuration and some folks
don’t know that you have to do this. No mention of this is made on the package they come in.
I recommend revisiting all CA joints with an application of Aliphatic resin glue for maximum strength.